

Roadside Emergency Kit: What to Pack and Why
Last Updated: November 17, 2026
Quick Summary
A roadside emergency kit is a set of tools, supplies and visibility gear stored in your vehicle so you can handle a breakdown, flat tire, crash or medical problem without waiting for outside help. Build it around the situations you are most likely to face, such as a dead battery, a flat tire, a minor injury or a long wait.
- Pack jumper cables at least 12 feet long, using heavy-gauge copper wire.
- Keep at least one gallon of water per person per day for a short wait.
- Test your battery before winter and keep jumper cables within easy reach.
- Keep the exhaust pipe clear of snow to prevent carbon monoxide entering the cabin.
- Check the air compressor monthly and confirm it reaches your tire's pressure.
Table of Contents
- Why a Roadside Emergency Kit Matters for Every Driver
- Roadside Emergency Kit List: Core Items to Pack
- Roadside Emergency Kit with Air Compressor: Flat Tire Tools
- Winter Car Emergency Kit: Adding Cold-Weather Gear
- Car Emergency Kit Checklist by Emergency Type and Budget
- Safe Roadside Response and Kit Maintenance Schedule
- Building Your Kit Around the Shelter-in-Place Workbook
- Frequently Asked Questions
Why a Roadside Emergency Kit Matters for Every Driver
Most drivers never think about a roadside emergency kit until they are stranded at night with a dead battery and no way to call for help.
A common mistake is building the kit around gadgets instead of scenarios. Ask "What am I most likely to face on my usual routes?" and pack for that.
Water is one of the most overlooked items.
Roadside Emergency Kit List: Core Items to Pack
A solid base kit covers power, light, visibility, first aid and basic repair. Start with these categories and adjust for your vehicle and climate.
Packing a roadside emergency kit is easier when you group items by job, and everything should earn its place by solving a problem you can realistically face. For a step-by-step approach to storing water, see [How to Store Water for Emergencies: A Step-by-Step Guide | preppiprepper.com].
- Jumper cables (at least 12 feet, with heavy-gauge copper wire)
- Flashlight with spare batteries, or a hand-crank light
- Warning triangles or flares for visibility
Jumper Cables, Flashlights and Spare Batteries
Jumper cables are the single most-used item in most roadside kits. Thick copper wire is generally preferred, since thin gauge cables can struggle to deliver enough current to start a larger engine.
A flashlight is equally important, and one that does not depend on the car's battery is the better choice. Pack spare batteries in the same bag, check them once a year, and make sure the light is easy to find in the dark.
First-Aid Supplies, Water and Emergency Food
A basic first-aid kit should hold bandages, gauze pads, adhesive tape, antiseptic wipes, antibiotic ointment, burn cream, tweezers and over-the-counter pain relievers. Check expiration dates at least twice a year and replace anything expired or used.
Plan for at least one gallon of water per person per day for a short wait, plus food that needs no preparation, such as granola bars and nuts.
Roadside Emergency Kit with Air Compressor: Flat Tire Tools
A flat tire is among the most common roadside problems, and a portable air compressor can save you from relying on a spare you may not trust.
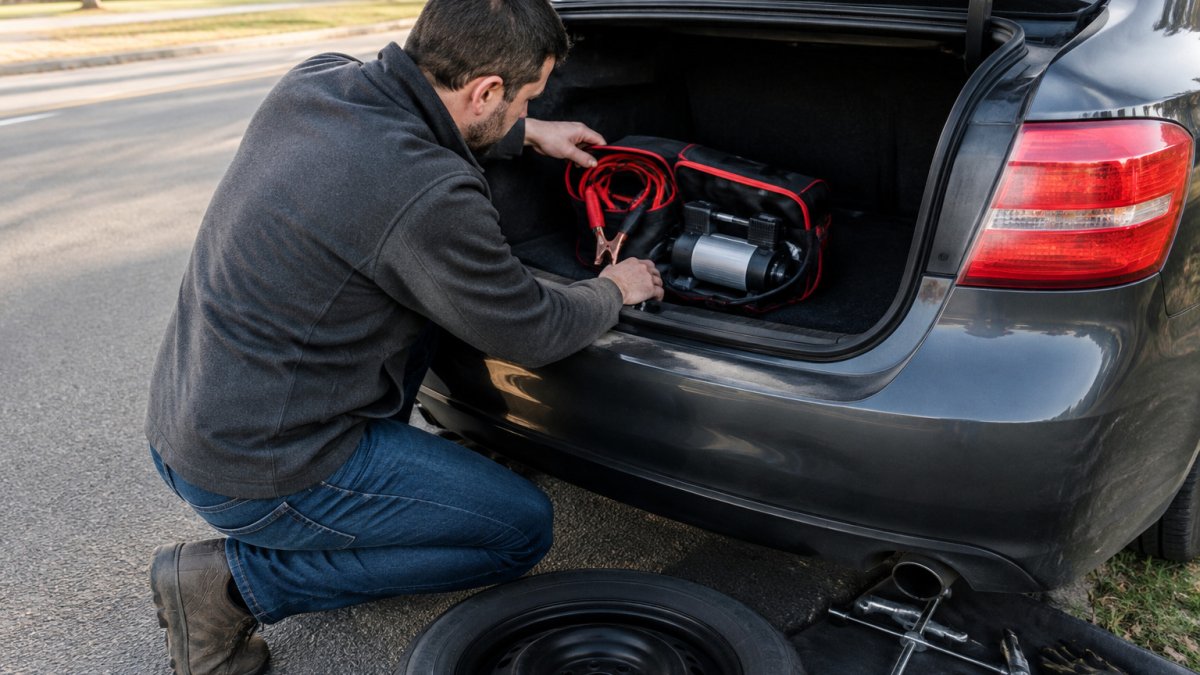
A driver kneeling beside a parked sedan on a suburban shoulder, opening a compact roadside kit in the trunk with jumper cables and a portable air compressor visible.
Keep your tow strap and work gloves in the same area, since changing a tire or pulling a vehicle out of a ditch both require them.
Winter Car Emergency Kit: Adding Cold-Weather Gear
If you drive where temperatures drop below freezing, the core kit needs a winter layer.
Add these items to your core kit for cold-weather driving:
- Warm blankets or a sleeping bag rated for low temperatures
- Hats, gloves and a spare set of dry socks
- An ice scraper and snow brush
Keep the exhaust pipe clear of snow when the engine is running. A blocked tailpipe can allow carbon monoxide into the cabin, one of the most serious risks in a winter breakdown (the CDC).
Winter also drains batteries faster. Test your battery before the cold season begins, and keep your jumper cables and flashlight within easy reach.
Car Emergency Kit Checklist by Emergency Type and Budget
A useful kit is organized around what you are likely to face, not just a pile of items. The checklist below groups supplies by emergency type, gives the quantities that matter, and shows what to add as your budget grows.
Dead battery
- Basic (about $25-$45): A set of 12-foot, 6-gauge copper jumper cables. Six-gauge wire carries enough current for most four-cylinder and V-6 engines; 8-gauge cables are common but struggle on larger engines and in cold weather.
- Mid (about $80-$150): Add a portable lithium jump starter rated for your engine size. A unit rated around 1,000 peak amps will start most passenger cars and light SUVs; check the rating against your engine displacement before buying.
- What to do: Pull as far onto the shoulder as possible, turn on hazard lights, and set the parking brake. Connect red to positive and black to negative on the good battery, then black to a bare metal ground on the dead vehicle, not to the negative terminal, to reduce spark risk near the battery. Start the good vehicle, wait a minute, then start the dead one.
Flat tire
- Basic (about $15-$30): A quality tire pressure gauge and a can of tire sealant. Sealant works on small tread punctures, not sidewall damage.
- Mid (about $40-$90): Add a 12-volt portable air compressor. Look for one that reaches at least 40 psi, since many compact spares call for 60 psi.
- What to do: Move well off the travel lane, set the parking brake, and turn on hazards. If you have a spare and feel safe changing it, loosen the lug nuts slightly before jacking. If not, seal and inflate, then drive slowly to the nearest service station.
Collision or breakdown in traffic
- Basic (about $20-$35): A reflective safety vest for each occupant and a set of three warning triangles.
- Mid (about $40-$70): Add roadside flares or a rechargeable LED warning beacon.
- What to do: Get everyone out on the side away from traffic and behind the barrier if there is one. Place triangles about 10 feet behind the vehicle in town, and roughly 100 feet back on a highway, farther if traffic is fast or visibility is poor.
Minor injury
- Basic (about $15-$25): A compact first-aid kit with adhesive bandages, gauze pads, tape, antiseptic wipes and tweezers.
- Mid (about $30-$60): Add antibiotic ointment, burn cream, over-the-counter pain relievers, nitrile gloves and a CPR face shield.
- What to do: Treat cuts and burns before moving the vehicle if anyone is hurt, and call 911 for anything beyond a minor injury.
Long wait or stranding
- Basic (about $20-$40): One gallon of water per person and shelf-stable food such as granola bars and nuts.
- Mid (about $50-$100): Add a blanket or sleeping bag per occupant, a hand-crank radio and a power bank for your phone.
- What to do: Stay with the vehicle unless you have a safe, short walk to help. Run the engine briefly for heat, but crack a window and keep the exhaust clear.
Start with the basic tier for each scenario and upgrade only the items you are most likely to need. A jump starter costs more than cables but removes the need to flag down another car.
Checklist for a DIY kit:
- Jumper cables or a jump starter
- Flashlight with spare batteries
- Warning triangles or flares
The table below sums up which items to pack for each type of emergency, with the rough cost tiers and key notes from the checklist.
| Emergency | Basic tier | Mid tier and key note |
|---|---|---|
| Dead battery | 12-foot, 6-gauge jumper cables (about $25-$45) | Portable jump starter rated ~1,000 peak amps (about $80-$150) |
| Flat tire | Tire pressure gauge and sealant (about $15-$30) | 12-volt compressor reaching 40 psi+ (about $40-$90) |
| Collision or breakdown in traffic | Reflective vest per occupant and three warning triangles (about $20-$35) | Roadside flares or LED beacon (about $40-$70) |
| Minor injury | Compact first-aid kit (about $15-$25) | Antibiotic ointment, burn cream, nitrile gloves (about $30-$60) |
| Long wait or stranding | One gallon of water per person and shelf-stable food (about $20-$40) | Blanket per occupant, hand-crank radio, power bank (about $50-$100) |
Cost ranges by emergency type (basic tier)
Safe Roadside Response and Kit Maintenance Schedule
Having the kit is only half the job. Knowing how to respond safely on the roadside matters just as much, and most product-focused guides skip it. The procedures below follow the same logic used by highway safety agencies: get out of the travel lane, make yourself visible, and call for help before attempting a repair.
Step 1: Get clear of traffic
Pull as far onto the shoulder as the surface allows, turn on hazard lights, and set the parking brake. If the vehicle is stuck in a travel lane, get everyone out on the side away from traffic and behind a barrier if one exists.
Watch out: Standing between your car and oncoming traffic to inspect damage is one of the most common ways roadside bystanders are struck.
Step 2: Make the scene visible
Put on a reflective vest before you step out. Place warning triangles about 10 feet behind the vehicle in town, roughly 100 feet back on a highway, and farther if traffic is fast or visibility is poor. On a curve or hill, place the first triangle before the curve so approaching drivers see it in time.
Step 3: Decide whether to stay or call
Stay with the vehicle if you have water, warmth and a way to call for help. Call 911 if anyone is injured, if the vehicle is in a live lane, or if you feel unsafe. For a dead battery or flat tire on a quiet road, roadside assistance is usually safer than working in traffic.
Step 4: Work only when it is safe
If you change a tire or connect jumper cables, keep the open trunk or hood between you and the lanes whenever possible. Open the trunk only when traffic is clear. Never crawl under a vehicle on a shoulder.
Maintenance schedule
Kit maintenance is where most kits fail: items expire, batteries drain and water goes stale. Set a simple schedule tied to a date you will remember, such as the daylight saving time changes:
- Every month: Click the flashlight on and off, test the air compressor, and check tire pressure, including the spare.
- Every three months: Inspect water and food, and replace anything past its date. Check that the power bank holds a charge.
- Every six months: Review the first-aid kit, replace expired medication and ointment, and confirm the fire extinguisher gauge is in the green if you carry one.
A dated inspection log taped inside the kit lid makes the routine visible and keeps it from slipping. Note when each item was checked and its next replacement date, so the kit stays usable instead of becoming a box of expired supplies.
Building Your Kit Around the Shelter-in-Place Workbook
A roadside kit handles the minutes and hours of a breakdown. For drivers who want to extend preparedness beyond the car, the Survival Guide & Workbook: In Case of Emergency - Shelter-In-Place from Preppi Prepper walks through structured planning for staying put during a crisis.
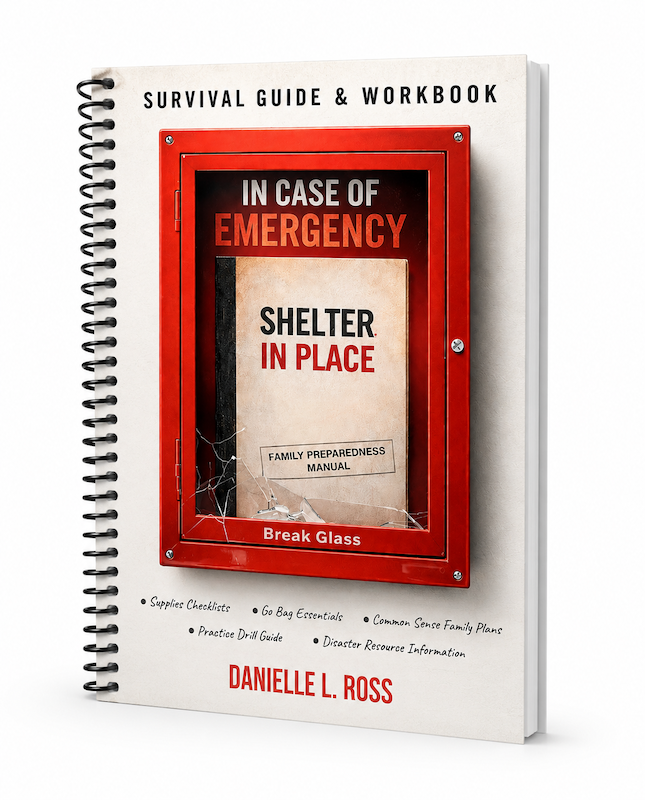
The Survival Guide & Workbook: In Case of Emergency - Shelter-In-Place is available for $28.99. Use its checklists to decide which supplies belong in the house, which belong in the car and which should be duplicated in both places.
Thinking about a kit in this way keeps preparedness practical. Your car kit handles the immediate roadside problem, and your home plan handles the situation that keeps you off the road.
Frequently Asked Questions
What should be in a roadside emergency kit?
A basic roadside emergency kit should include jumper cables, a flashlight with spare batteries, a first-aid kit, warning triangles or flares, a reflective safety vest, bottled water, non-perishable emergency food, work gloves, rags and a tire repair or inflation tool. Add a tow strap and a phone charger if you drive often. Pack items you can actually use one-handed on a dark shoulder, and store them in a bin so they stay together and easy to reach.
Should a roadside emergency kit include an air compressor?
Yes, a portable 12-volt air compressor is one of the most useful additions to a roadside emergency kit because many flat tires are slow leaks that can be inflated enough to reach a shop. Choose a model that plugs into the vehicle's power outlet and includes a pressure gauge. Test it at home before you need it, and keep a tire sealant or plug kit as backup for larger punctures.
What should you keep in your car for a winter emergency?
A winter car emergency kit should add a warm blanket, extra hats and gloves, a small shovel, a bag of sand or cat litter for traction, an ice scraper, and high-energy food. Keep a fully charged power bank and a flashlight with fresh batteries. Include hand warmers and a windshield washer fluid rated for freezing temperatures, and keep the gas tank at least half full during cold months.
How often should you check or replace items in a car emergency kit?
Review your car emergency kit checklist at least twice a year, ideally when you change your clocks. Check expiration dates on water, food, medications and first-aid supplies, and replace batteries in flashlights. Test jumper cables and the air compressor, and make sure the spare tire is inflated. Replace any items that were used during a trip the same day you return home.
