

Disaster Preparedness Workbook for Beginners: A Review
Table of Contents
- The Verdict: What a Beginner Workbook Should Actually Do
- How We Evaluated Beginner Disaster Preparedness Workbooks
- Strengths: Where a Guided Workbook Beats Free PDFs
- Weaknesses and Who This Workbook Is Not For
- How to Prepare for a Disaster at Home: A Four-Week Walkthrough
- Filling In Your Family Emergency Plan Template
- Building a Home Emergency Supply List Without Overspending
- The Shelter-in-Place Checklist for Apartments and Houses
- Frequently Asked Questions
Last Updated: October 21, 2026
The Verdict: What a Beginner Workbook Should Actually Do
A disaster preparedness workbook for beginners should turn vague worry into a written, testable plan: worksheets, checklists, and a clear path from risk assessment to practice, not a binder of scary facts.
Most preparedness content is either a single-page checklist or a dense government manual.
A good beginner workbook closes that gap. It should:
- Walk you through a household risk assessment before it tells you what to buy
- Give you a family emergency plan template you fill in, not just read
- Include a home emergency supply list you can stage over time and budget
That last point is where most resources fail. A plan you wrote once and never opened again is not a plan.
How We Evaluated Beginner Disaster Preparedness Workbooks
We scored each workbook against five practical criteria a beginner can actually check. No jargon, no assumptions about gear budgets.
- Structure: Does it move in a logical order, from risk to plan to supplies to practice?
- Fill-in usability: Are there real worksheets, or just prose with a checklist stapled on?
- Household fit: Does it handle apartments, renters, kids, pets, and access needs?
- Maintenance: Does it tell you when and how to review and update the plan?
- Honesty about cost: Does it help you stage spending, or does it push a shopping list?
The market splits cleanly: free checklists score well on cost but poorly on structure, institutional guides score well on authority but poorly on beginner usability.
For official baseline guidance on what a household plan should contain, the ready.gov household emergency plan guidance is the standard reference point.
Strengths: Where a Guided Workbook Beats Free PDFs
Guided workbooks win on sequence and follow-through. A free PDF gives you a list. A workbook gives you an order of operations and a place to write your answers.
The strengths that show up consistently:
- A single place for everything. Contacts, routes, supply inventory, and meeting spots live in one book instead of six browser tabs.
- Prompts that force decisions. "Where will we meet?" is a question you answer on paper, not one you nod at and forget.
- Inclusive planning. Strong workbooks ask about medical needs, mobility, service animals, and family members in other states.
That first strength answers a common objection: "I already have prep stuff scattered around the house." A workbook doesn't tell you to buy more; its inventory page shows what you own, what's expired, and what's missing.
Weaknesses and Who This Workbook Is Not For
No workbook is right for everyone. Skip a guided workbook if any of these describe you.
- You want gear, not paperwork. A workbook organizes a plan. It won't stock your closet.
- You already have a practiced plan. If your household drills twice a year, you've outgrown beginner material.
- You won't fill in worksheets. An unfilled workbook is a paperweight. Be honest about whether you'll do the writing.
The other real weakness is price perception: a workbook can feel expensive next to free downloads. You're paying for structure and sequence, not information. If you'll do the work, that structure is the whole value; if you won't, use free checklists.
How to Prepare for a Disaster at Home: A Four-Week Walkthrough
Here is the four-week sequence we would use, mirroring how a good beginner workbook is laid out. Each week takes a couple of hours you can spread across evenings.
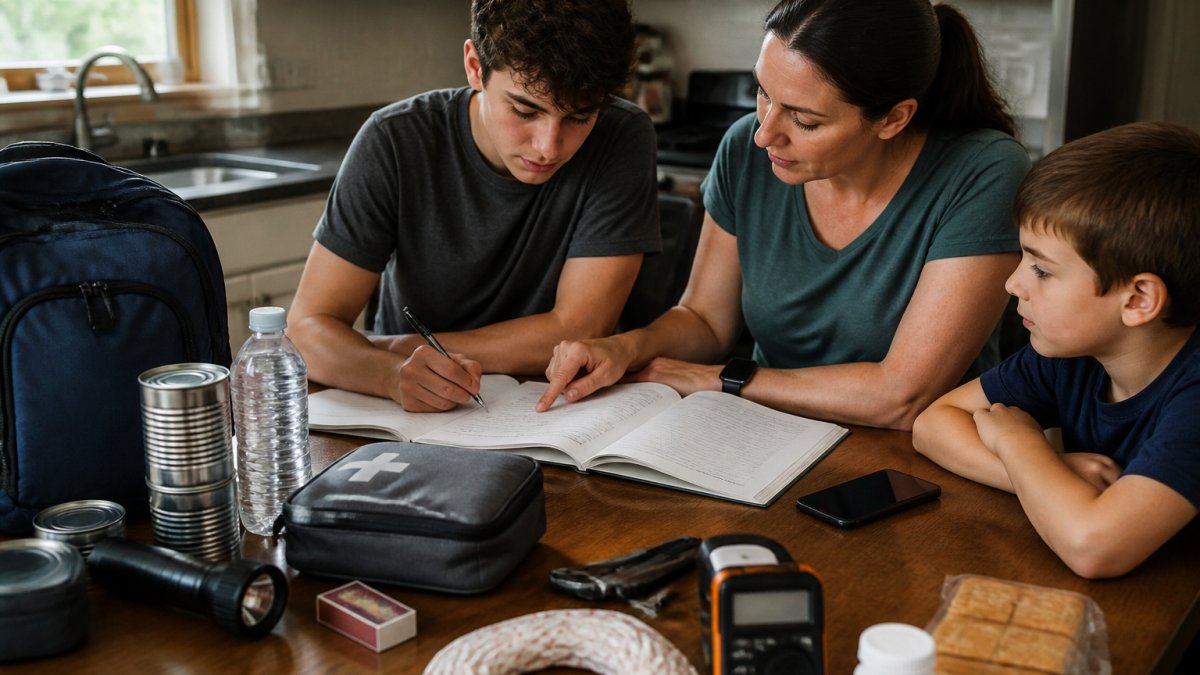
| Week | Focus | Time Needed | Output |
|---|---|---|---|
| 1 | Household risk assessment | 1-2 hours | Ranked list of likely risks |
| 2 | Contacts, communication, evacuation | 2 hours | Filled contact card and route map |
| 3 | Supplies and shelter decisions | 2-3 hours | Staged supply list and shelter plan |
| 4 | Practice and household buy-in | 1-2 hours | A drill and a review date |
Week 1: Household Risk Assessment
Start with what is actually likely to hit your home, not a generic disaster list. A household-specific assessment beats the national hazard list most beginner workbooks hand you.
Score each risk on two axes: how likely it is in your area and how much it would disrupt your household.
- Local climate: floods, wildfires, hurricanes, tornadoes, winter storms, extreme heat, or drought. Your county emergency management office publishes the hazards it plans for, and that list is a better starting point than a generic one.
- Housing risks: a single exit, a basement that floods, a top-floor apartment with no elevator, a mobile home, or a building with a shared utility shutoff. Renters should note what the landlord controls versus what they control.
- Household vulnerabilities: medical equipment that needs power, mobility aids, medications that need refrigeration, young children, older adults, pets, and service animals. Write these down explicitly, because they change the plan more than gear does.
Rank the results. A household in a flood zone and one in a wildfire zone need different plans.
Week 2: Contacts, Communication, and Evacuation Routes
Communication breaks first in most emergencies. Build the contact card before anything else, filled in by hand so it works when the phone does not.
- One out-of-state contact everyone calls, since local lines may jam. Ask that person first, and tell them they are the hub.
- Two meeting spots: one near home, one outside the neighborhood, with street addresses written out.
- School and workplace pickup rules, written down, including who is authorized to pick up each child.
Then map two evacuation routes from your home. For households spread across states, the out-of-state contact is the whole communication plan, so pick someone reliable and tell them they are it.
For households with access needs, add a line to the card for each person: mobility device, medication, communication method, and backup caregiver.
Week 3: Supplies and Shelter Decisions
Now you decide: evacuate or shelter in place. Most households shelter far more often than they evacuate, so plan for it first. Write your decision rules on the page, the conditions for leaving rather than staying, and who makes the call.
Build your home emergency supply list in stages rather than all at once. Start with water, food, medications, and light, and add the rest over a few paychecks. The supply section below covers quantities and storage.
Book: Survival Guide & Workbook: In Case of Emergency - Shelter-In-Place →
Week 4: Practice and Household Buy-In
A plan nobody else knows is a solo plan. Run a short drill with the whole household.
- Do a two-minute "meet at the spot" walk-through.
- Have each family member find the contact card and read the out-of-state number aloud.
- Test that everyone can open the supply bin and locate the flashlight.
Then set a review date on the calendar, six months out, and write it on the inside cover of the workbook. That single habit separates a living plan from a forgotten one.
Filling In Your Family Emergency Plan Template
A family emergency plan template is only useful if every field gets filled. Here's how to complete the pages that matter.
Work through these in order and write in pen:
- Household roster: every person, plus pets and service animals, with any medical or access needs noted
- Contacts: the out-of-state contact first, then local, school, work, and vet
- Meeting spots: near home and outside the neighborhood, with addresses
Building a Home Emergency Supply List Without Overspending
You do not need to buy everything in one trip, and any resource that implies otherwise is selling gear, not preparedness. Stage your home emergency supply list over several weeks and store each item where you will find it under stress.
Start with quantities, not products
A supply list without numbers is a wish list. Use these baseline quantities as worksheet targets, adjusted for household size:
- Water: one gallon per person per day for drinking and basic hygiene, with a minimum three-day supply at home and a two-week target if you have room to store it. A four-person household is looking at 12 gallons for the three-day minimum.
- Food: three days of shelf-stable food minimum, one week as a realistic goal. Count calories roughly, not perfectly, most adults need somewhere in the range of 1,600 to 2,400 calories a day depending on activity, so plan meals rather than individual items.
- Medications: a seven-day supply of prescriptions if your insurer and pharmacy allow early refills, plus a written list of drug names, doses, and prescriber phone numbers.
Stage the spending across paychecks
Treat the list as a budget line, not a shopping spree. Buy one tier per pay period:
- Tier 1 (first paycheck): water, shelf-stable food you already eat, medications, flashlight, batteries, phone charger, first aid basics. This tier alone covers most short outages.
- Tier 2 (next paycheck): battery or hand-crank radio, documents in a waterproof bag, cash in small bills, hygiene items, a manual can opener.
- Tier 3 (following paychecks): comfort items for kids, pet food and a spare leash, spare glasses, basic tools, plastic sheeting and tape if local guidance calls for sealing a room.
Low-cost alternatives matter: store tap water in food-grade containers, buy store-brand shelf-stable food you already cook with, and use a hand-crank radio to remove the battery dependency. None of these weaken the plan; they make it affordable enough to finish.
Store it where you will use it
A supply bin in a garage you cannot reach during a flood is not a supply. Split your kit:
- Go-bag: a duffel or backpack per adult with documents, medications, a change of clothes, and a flashlight, kept near the exit you would actually use.
- Home bin: the bulk of water, food, and tools, in the coolest, driest closet you have.
- Shelter room: a small stash of water, snacks, medication, and a flashlight in the interior room you would seal off.
Rotate instead of rebuying
The most common waste in beginner preparedness is expired food and dead batteries. Build rotation into your routine:
- Check expiration dates every six months, on the same weekend you change smoke detector batteries.
- Eat food that is nearing its date and replace it on the next grocery trip.
- Recharge power banks monthly and test flashlights.
For food and water safety specifics during an outage, the USDA food safety guidance for emergencies is the reference to keep on hand.
The Shelter-in-Place Checklist for Apartments and Houses
Shelter-in-place means staying put in a sealed, safe room until officials say otherwise.
A practical shelter-in-place checklist:
- Pick one interior room with few or no windows
- Store water, snacks, medications, and a flashlight in or near it
- Keep plastic sheeting and tape if local guidance calls for sealing a room
Renters should confirm building rules ahead of time, like whether the building has a designated shelter area. For the official shelter-in-place instructions, the ready.gov shelter-in-place guidance spells out the steps.
This is where a purpose-built resource helps. [Preppi Prepper's Survival Guide & Workbook: In Case of Emergency - Shelter-In-Place](https://www.preppiprepper.com/products/a-survival-guide-and-workbook-in-case-of-emergency-shelter-in-place) is built around exactly this scenario, with worksheets and checklists that walk you through the plan rather than just describing it.

Preparedness stalls for one reason: the plan never gets written down. If you've read this far, you already know the four weeks and the pages that matter.
Frequently Asked Questions
What should a household emergency plan include?
At minimum: a meeting place outside the home, an out-of-area contact everyone can reach, evacuation routes from each room, a supplies list, and medical and access needs for every person and pet. A disaster preparedness workbook for beginners usually structures these as fill-in pages so nothing gets skipped. Keep a printed copy in a binder and a photo of it on each phone. Review it twice a year and after any move, new pet, or change in a family member's health.
How is a paid workbook different from free printable emergency checklists for home?
Free checklists give you a list. A workbook gives you a sequence: assess your risks, fill in contacts, build supplies in stages, then practice. The value is in the order and the prompts that force decisions free PDFs leave blank, such as where your household meets if phones fail. If you already have supplies scattered around the house, a structured workbook is the tool that turns them into an actual plan rather than a pile in the garage.
How often should you update a family emergency plan?
Twice a year is a workable rhythm, plus immediately after any major change: a move, a new baby, a pet, a medical diagnosis, or a job change that alters who is home during the day. Check expiration dates on food, water, and medications at the same time. Many families tie the review to a daylight saving time change so it becomes automatic. Write the next review date inside the workbook cover so it is not a memory test.
How much emergency food and water should a household store?
A common starting target is one gallon of water per person per day and shelf-stable food for at least three days, ideally two weeks if space and budget allow. Add pet food, formula, and any prescription medications to that count. Beginners should buy in stages rather than all at once: one extra week of shelf-stable food per shopping trip builds a two-week buffer in a couple of months without a large single purchase.
Can a shelter-in-place plan work for an apartment?
Yes, and apartments often need a different checklist than houses. You may not control the building's water shutoff, you likely have one exit route, and you probably have less storage. A shelter-in-place checklist for apartment dwellers should cover sealing a single room, knowing your stairwell, storing supplies vertically, and identifying a neighbor who can help. Renters should also keep copies of their lease and renter's insurance in the same binder as the plan.