

Essential Survival Gear for Beginners: Where to Start
Last Updated: October 30, 2026
Quick Summary
The best survival gear for beginners covers water, food, light, first aid, warmth and a way to communicate. Start with one gallon of water per person per day for three days, plus a flashlight, a basic first-aid kit and a multi-tool.
- Plan one gallon of water per person per day, and about 1.5 gallons in hot conditions.
- Stock three days of food per person that your household already eats and needs little cooking.
- Test a sample of older dry goods and replace expired items every six months.
- Practice with each tool before storing it, since stiff or awkward tools get avoided in emergencies.
- Build your kit over several months, adding one or two items per paycheck.
Table of Contents
- Why Start With a Short List of Essentials
- Water and Emergency Food: The First Priority
- Shelter, Warmth and Fire Starting
- Navigation, Signaling and Light
- First Aid, Cutting Tools and Multi-Tools
- Building a Basic Survival Kit Checklist on a Budget
- Packing Your 72-Hour Emergency Kit and Keeping It Current
- Choosing Your First Purchase and Your Next Step
- Frequently Asked Questions
Why Start With a Short List of Essentials
Most new preppers buy too much, too soon, and the result is often a closet full of tools nobody knows how to use. A better approach is to start with a short list of survival gear essentials and build from there.
The goal is simple. You want a kit that handles the most likely emergencies first, such as a power outage, a storm, or a short evacuation. Once those basics are covered, you can add more specialized items.
Survival gear is any equipment that helps you stay safe, warm, fed, and informed when normal services fail. For beginners, that usually means water, food, light, first aid, and a way to communicate.
Think of your starting list as a foundation, not a finished kit. You will refine it as you learn what your household actually needs.
Water and Emergency Food: The First Priority
Water and food are the two categories where beginners most often either under-buy or buy the wrong format. Get these right first, because everything else in your kit assumes you can drink and eat without outside help.
How much water you actually need
The commonly cited baseline is one gallon of water per person per day for drinking and basic sanitation. That figure assumes moderate climate and normal activity. In summer heat, during physical work, or for households with young children, nursing mothers, or pets, plan closer to 1.5 gallons per person per day.
Store water in food-grade containers only. Our step-by-step guide to storing water for emergencies walks through container choice, filling, and labeling. Rigid polyethylene jugs, stackable water bricks, and commercially bottled water all work. Avoid milk jugs and other containers that held dairy or juice, they are difficult to sanitize and degrade quickly. Keep stored water out of direct sunlight and away from gasoline, paint, or solvents, since plastic can absorb vapors over time.
If you plan to rely on tap water during an outage, keep a supply of unscented household bleach for disinfection (about eight drops per gallon for clear water, following label directions) or a filter rated to remove protozoa such as Giardia and Cryptosporidium (the EPA). Boiling remains the most reliable method when fuel is available.
Emergency food that you will actually eat
A three-day food supply per person is the standard starting point, but the practical rule is simpler: stock food your household already eats, in portions that need little or no cooking. Canned meats, fish, beans, and vegetables; peanut butter; whole-grain crackers; dried fruit and nuts; and ready-to-eat meal pouches all fit.
Rotate food on a first-in, first-out basis. Write the purchase date on each item, store it in a cool, dry place, and work older stock into regular meals. Canned goods typically hold quality for two to five years; crackers and nuts go stale faster and should be cycled annually. Freeze-dried meal pouches last much longer but cost more per serving, so they work best as an upgrade rather than a starter purchase.
A simple rotation schedule
Check water and food every six months. Replace any water past its rotation date, discard swollen or dented cans, and taste-test a sample of older dry goods. This schedule pairs with the kit-maintenance routine covered later in this guide, so you can handle water, food, batteries, and medications in one pass.
For a structured place to log quantities and rotation dates, the Survival Guide & Workbook: In Case of Emergency - Shelter-In-Place ($28.99) offers a planning workbook for emergency preparedness.

Shelter, Warmth and Fire Starting
Shelter and warmth protect you from weather, and fire helps with warmth, cooking, and purifying water. For beginners, a few simple items cover most situations:
- Emergency blankets or a sleeping bag rated for your climate
- A tarp or lightweight shelter for an outdoor night
- Waterproof matches or a ferro rod
- A lighter with a spare
Practice starting a fire before you need one. Wet conditions make fire-making far harder than it looks in a backyard. Keep your fire starters dry in a sealed bag.
Navigation, Signaling and Light
If you ever need to leave home on foot or by vehicle, you will need to find your way. A paper map and a compass work even when phones die. Learn how to read a map before you need it.
Signaling matters too. A whistle carries farther than your voice and uses little energy. A bright flashlight or headlamp helps you see at night and signal for help. Pack spare batteries, and consider a hand-crank light that never runs out.
Watch out: Phone apps and GPS can fail during outages or in areas without cell coverage. Treat them as a bonus, not your only navigation plan.
First Aid, Cutting Tools and Multi-Tools
This section covers the two categories beginners most often buy once and never inspect: medical supplies and cutting tools. Both need a deliberate starting choice and a simple upkeep routine.
Book: Survival Guide & Workbook: In Case of Emergency - Shelter-In-Place →
Building a first-aid kit that fits your household
A starter kit should cover bleeding, burns, blisters, and minor infections. At minimum, include:
- Adhesive bandages in several sizes and rolled gauze
- Medical tape and elastic wrap
- Antiseptic wipes and antibiotic ointment
- Non-latex gloves
- Tweezers and blunt-tip scissors
- Pain relievers and fever reducers
- Any prescription medications your household takes, with a written copy of dosages
Buy a pre-assembled kit as a base, then add household-specific items: epinephrine auto-injectors, inhalers, insulin, or children's dosing supplies. Store medications in their original labeled containers and keep a written list of prescriptions, allergies, and emergency contacts inside the kit.
A common beginner mistake is buying a large kit with hundreds of pieces and never learning what is inside. A smaller kit you have opened, organized, and practiced with beats a bigger one you have never inspected.
Choosing your first cutting tool
For most beginners, a sturdy folding knife is the right first purchase. Look for a locking blade between three and four inches, a handle that fills your hand, and a steel that holds an edge without being difficult to sharpen.
A multi-tool adds pliers, screwdrivers, scissors, and often a small saw in one compact package. It is the better second purchase for a household kit because the pliers and screwdrivers handle repairs that a knife cannot. A hatchet or folding shovel is useful for storm debris and camp work, but neither belongs in a first kit, they add weight and cost before the basics are covered.
Keeping tools ready
Sharpen knives at least once a season and oil the pivots on folding knives and multi-tools. Store blades closed and sheathed, and teach every household member how to open, use, and close each tool safely. A dull or rusted tool is more dangerous than a sharp one because it requires more force and slips more easily.
If you want a single reference that pairs first-aid contents with a tool-inspection schedule, the Survival Guide & Workbook: In Case of Emergency - Shelter-In-Place ($28.99) is a preparedness workbook you can use for planning.
Building a Basic Survival Kit Checklist on a Budget
You do not need a big budget to get started. A practical starting checklist might look like this:
- Water: one gallon per person per day for three days
- Food: three days of shelf-stable meals per person
- Flashlight and spare batteries
- Basic first-aid kit
- Emergency blankets
- Multi-tool or pocket knife
- Matches or a lighter
- Whistle and a paper map
- Phone charger or power bank
Budget tip: Build the kit over several months, adding one or two items per paycheck. Buy the basics first, then upgrade gear as you learn what works.
For a ready-made starting point, the Survival Guide & Workbook: In Case of Emergency - Shelter-In-Place ($28.99) is a preparedness workbook that can help you organize your planning.
Packing Your 72-Hour Emergency Kit and Keeping It Current
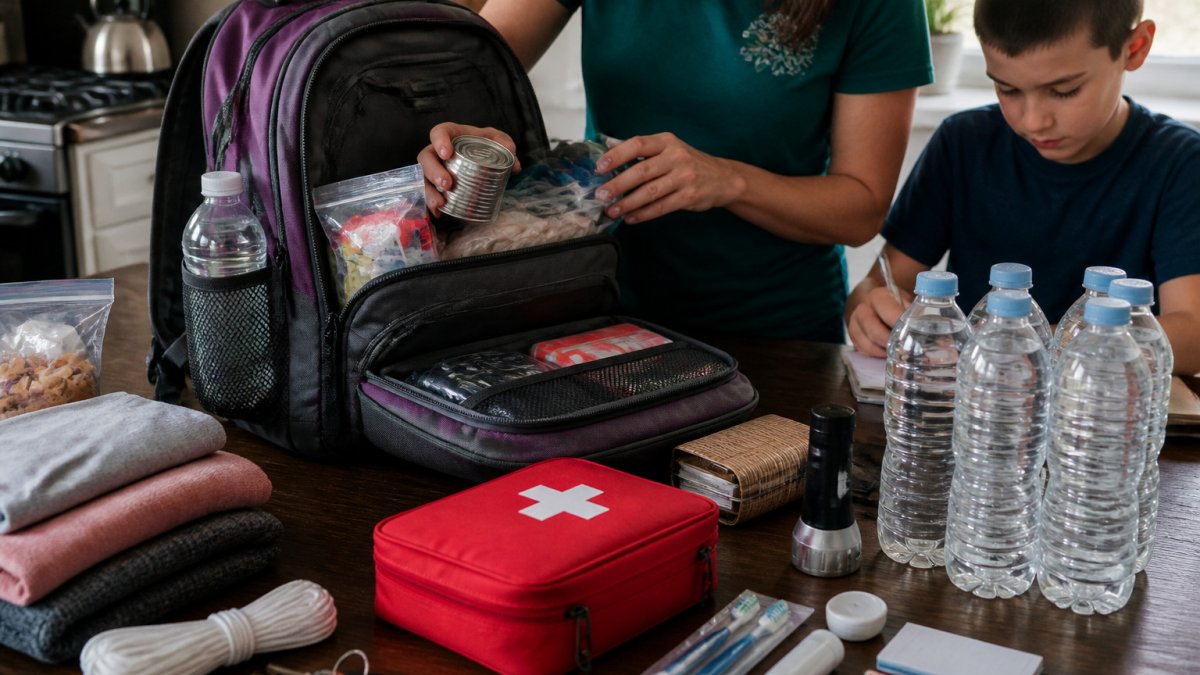
A 72-hour kit covers the first three days of most emergencies, when help may be slow to arrive. Pack it in a backpack or bin that is easy to carry and store it in an accessible spot, such as a hall closet or near an exit.
Our guide on 7 steps to maintain emergency kits long term explains how to check your supplies on a schedule. Mark your calendar to review the kit every six months. Replace expired food, test batteries, and update clothing sizes as children grow.
Choosing Your First Purchase and Your Next Step
Start with water, a flashlight, and a basic first-aid kit. These three items handle the most common emergencies and cost the least. Once they are in place, add food, warmth, and tools.
Many households find it helpful to plan before they buy. A written family communication plan makes sure everyone knows how to reach each other if phones stop working. Our guide on a family communication plan for emergencies walks through the steps.
Ready to put it all together? The Preppi Prepper survival guide and workbook can help you move from a loose pile of supplies to a clear, organized plan. You can order a complete home emergency planning kit to get started right away. Start with the basics this week, and check your progress each month.
Frequently Asked Questions
What survival gear should a beginner buy first?
Start with water storage and a way to treat or filter water, since you can survive only about three days without it. Next add a flashlight with spare batteries, a basic first-aid kit, and a fire starter such as waterproof matches or a lighter. Shelter, navigation and tools come after these. Buying in this order covers the most urgent needs first and keeps your initial spending under control.
What should be in a basic survival kit?
A practical basic survival kit includes water or a filter, a few days of shelf-stable food, a flashlight or headlamp with extra batteries, a weather-resistant first-aid kit, fire-starting tools, a multi-tool, a emergency blanket, a whistle for signaling and copies of important documents. Add prescription medications and any items your household needs, such as infant supplies or pet food. Review the list every six months and replace anything expired or damaged.
How do you build a survival kit on a budget?
Build the kit in tiers. Begin with the items that address water, light and first aid, which are inexpensive at a retail store. Use household items where they work, such as a large plastic container for storage and a spare blanket for warmth. Upgrade a single category at a time rather than buying everything at once. Spreading purchases over several paychecks often costs less overall than a single large order.
How often should you check or replace survival supplies?
Check your kit every six months. Replace food and water on their expiration dates, rotate batteries, and test flashlights and radios. Refresh medications and first-aid supplies as they expire. Practice using your fire starter and multi-tool periodically so you are comfortable with them when needed. Set a calendar reminder for the same date each time so the routine stays consistent.
